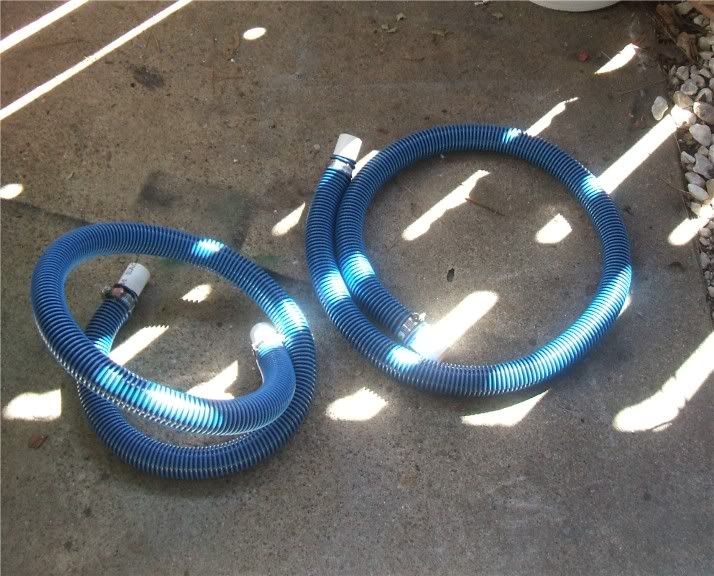
My DIY Overflow and Sump Project
Posted: Sun Nov 02, 2008 5:48 pm
My DIY Diary Overflow & Sump project. Many thanks to fshfrk from houstonfishbox.com for all the help he has given me. This is a diy overflow that he made, and he is helping me make my own. It has been a pleasure working with him on this project. We are not done yet but I wanted to share my progress with all of you.
I started this project last weekend while sitting at home thinking what can I do today to get ready for my new tank.
I started with 2-1" 10' pvc pipes
I purchased a mag 18 pump and I'm going to use it in my sump with a 10' head.
I also have a mag 9.5 if I end up with too much flow for the pump.
I'm using a 5 gallon bucket with a 29 gallon tank for my wet/dry.
Day 1
Here's what I have done so far:
1) cut eggcrate to fit inside the bucket.
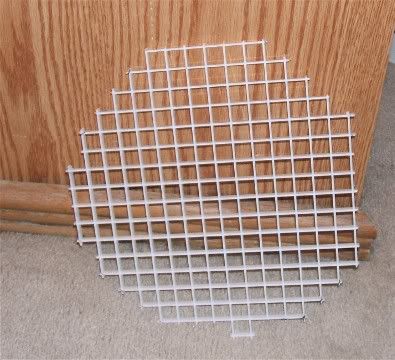
2) Drilled Bucket around the sides and at the bottom, placed eggcrate in bucket.
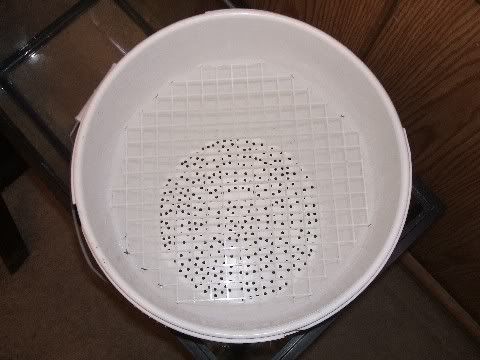
3) Placed bucket inside 29 gallon tank. I made sure it would fit before I started the project.
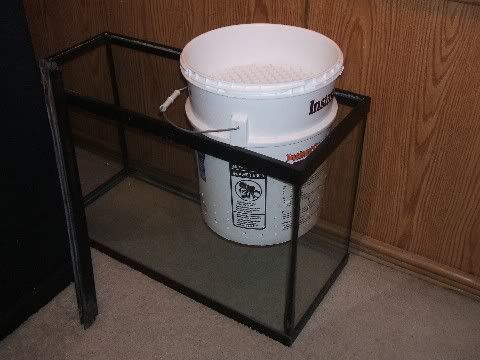
Now I need to figure out the overflow thing. After I get everything moved over to the tank I'll put the bio balls in the bucket and use the smaller wet/dry on the old tank.
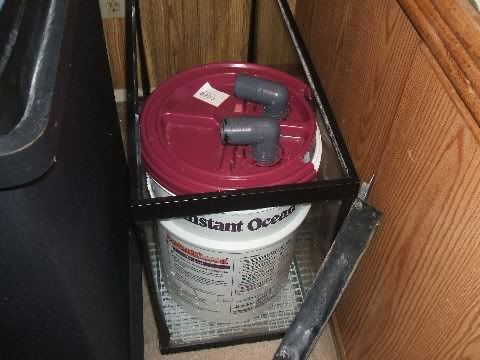
Next I cut the handles off and trimed the sides so that it would fit right into the tank. I also added some pieces of eggcrate under the bucket to raise it a bit. I then cut two holes in the lid and stuck two elbow pipes (1") in the holes. Here's the picture.
Day 2
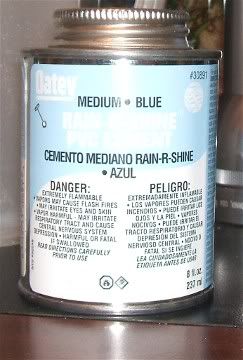
Ok made my first trip to lowe's. I got the pvc cement (rain-r-shine). It's what the chart said I needed.
There were a few things I couldn't find at Lowe's or Home Depot so that will wait for another day. I looked for plastic peg board, could not find any.
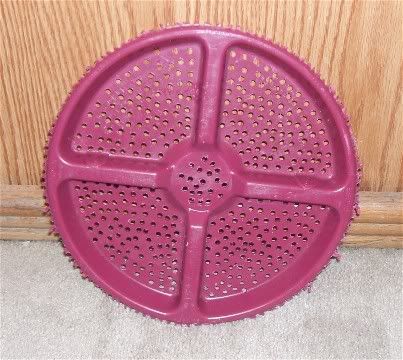
I gave up on the peg board and went to work on my own drip tray. I took another lid from a bucket and put holes in it. Here you go:
My husband is now helping me with the last few pieces I need, he did some measuring and explained a few thing to me. Like how to measure pipe, hose and other things. I usually just stick it together and see if it works, if it don't I get a bigger or smaller size. I found out what ID and OD are. I can honestly say I am learing alot from this little project. I think he might be impressed.
Day 3
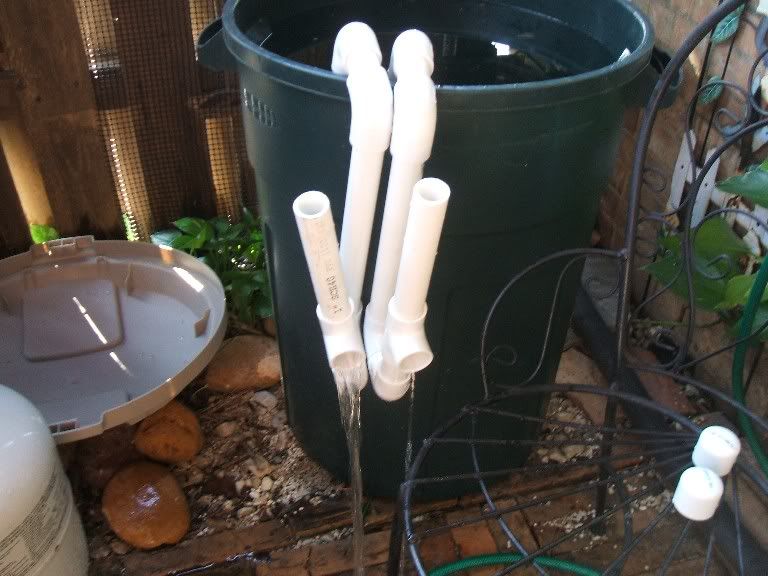
This is the second weekend working on my project. I decided to only work on it Sundays and Mondays (my days off). My husband found the last few items I need to continue with my project. I held and measured the pipe and my husband cut it for me. I then put it all together hung it on a trash can outside and started the siphon to test it. I have not glued anything in place yet. This was just my dry test run. I won't be able to totally finish until I get the tank here. Anyway here you go:
My two overflows:
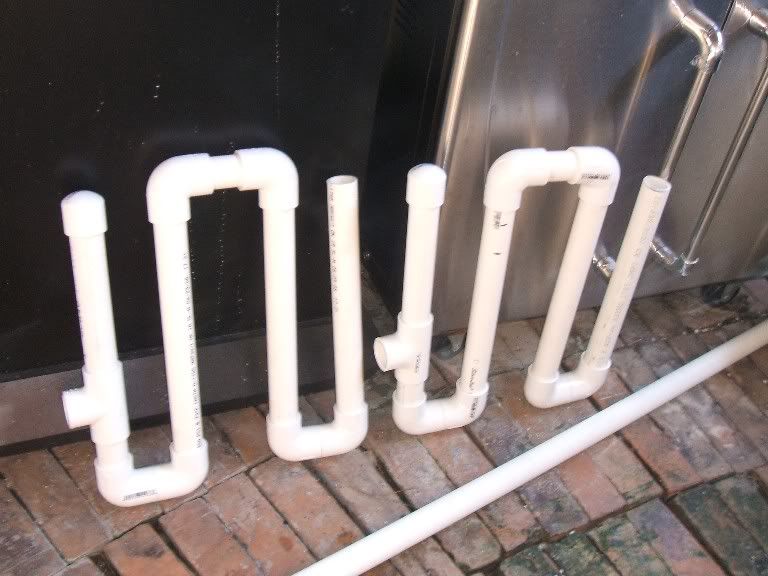
My test run on the trash can, as you can see I got one going really good and the other just a trickle. After trying again I managed to get both siphons running really well. I don't know what the exact flow rate is, I pulled the pipe up to stop the siphon and make sure it would restart . It did not loose the siphon, once I put it back down the water started to flow again.:
I started this project last weekend while sitting at home thinking what can I do today to get ready for my new tank.
I started with 2-1" 10' pvc pipes
I purchased a mag 18 pump and I'm going to use it in my sump with a 10' head.
I also have a mag 9.5 if I end up with too much flow for the pump.
I'm using a 5 gallon bucket with a 29 gallon tank for my wet/dry.
Day 1
Here's what I have done so far:
1) cut eggcrate to fit inside the bucket.
2) Drilled Bucket around the sides and at the bottom, placed eggcrate in bucket.
3) Placed bucket inside 29 gallon tank. I made sure it would fit before I started the project.
Now I need to figure out the overflow thing. After I get everything moved over to the tank I'll put the bio balls in the bucket and use the smaller wet/dry on the old tank.
Next I cut the handles off and trimed the sides so that it would fit right into the tank. I also added some pieces of eggcrate under the bucket to raise it a bit. I then cut two holes in the lid and stuck two elbow pipes (1") in the holes. Here's the picture.
Day 2
Ok made my first trip to lowe's. I got the pvc cement (rain-r-shine). It's what the chart said I needed.
There were a few things I couldn't find at Lowe's or Home Depot so that will wait for another day. I looked for plastic peg board, could not find any.
I gave up on the peg board and went to work on my own drip tray. I took another lid from a bucket and put holes in it. Here you go:
My husband is now helping me with the last few pieces I need, he did some measuring and explained a few thing to me. Like how to measure pipe, hose and other things. I usually just stick it together and see if it works, if it don't I get a bigger or smaller size. I found out what ID and OD are. I can honestly say I am learing alot from this little project. I think he might be impressed.
Day 3
This is the second weekend working on my project. I decided to only work on it Sundays and Mondays (my days off). My husband found the last few items I need to continue with my project. I held and measured the pipe and my husband cut it for me. I then put it all together hung it on a trash can outside and started the siphon to test it. I have not glued anything in place yet. This was just my dry test run. I won't be able to totally finish until I get the tank here. Anyway here you go:
My two overflows:
My test run on the trash can, as you can see I got one going really good and the other just a trickle. After trying again I managed to get both siphons running really well. I don't know what the exact flow rate is, I pulled the pipe up to stop the siphon and make sure it would restart . It did not loose the siphon, once I put it back down the water started to flow again.:
 I found out a hose clamp will not fit around the top of the T.