My DIY Overflow and Sump Project

Got any home remedies or DIY projects? Share them here!
Problems with your tank's equipment? We can help!
Post Reply
User avatar
edmlfc1
Mbu Puffer
Posts: 2011
Joined: Sun Sep 09, 2007 5:03 pm
My Puffers: Elvis (Stars & Stripes) R.I.P. 9/11/11
125G:Fahaka (Annabelle)
Location (country): U.S.A.
Location: Texas

My DIY Overflow and Sump Project

Post by edmlfc1 »

My DIY Diary Overflow & Sump project. Many thanks to fshfrk from houstonfishbox.com for all the help he has given me. This is a diy overflow that he made, and he is helping me make my own. It has been a pleasure working with him on this project. We are not done yet but I wanted to share my progress with all of you.


I started this project last weekend while sitting at home thinking what can I do today to get ready for my new tank.
I started with 2-1" 10' pvc pipes
I purchased a mag 18 pump and I'm going to use it in my sump with a 10' head.
I also have a mag 9.5 if I end up with too much flow for the pump.
I'm using a 5 gallon bucket with a 29 gallon tank for my wet/dry.

Day 1
Here's what I have done so far:
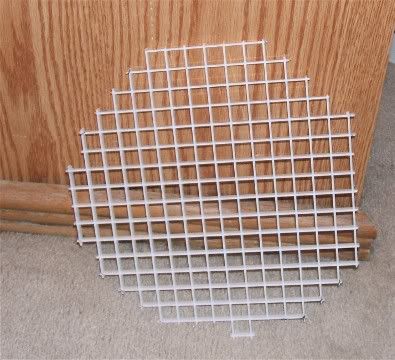
1) cut eggcrate to fit inside the bucket.
Image

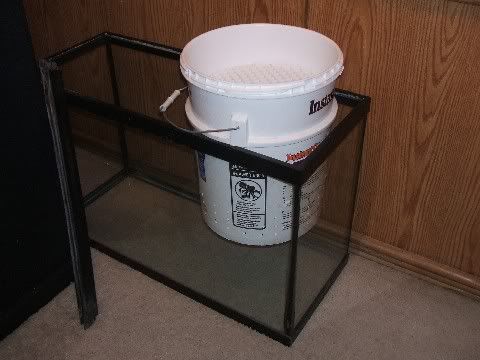
2) Drilled Bucket around the sides and at the bottom, placed eggcrate in bucket.
Image

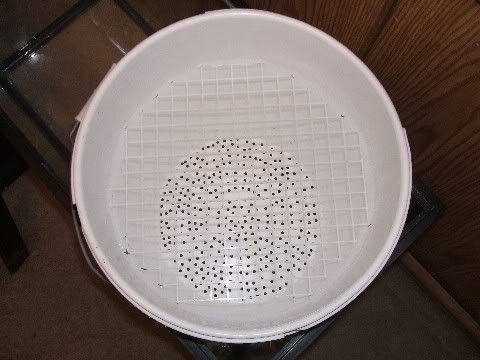
3) Placed bucket inside 29 gallon tank. I made sure it would fit before I started the project. :D
Image

Now I need to figure out the overflow thing. After I get everything moved over to the tank I'll put the bio balls in the bucket and use the smaller wet/dry on the old tank.

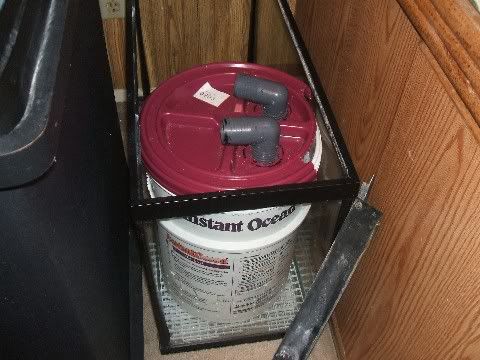
Next I cut the handles off and trimed the sides so that it would fit right into the tank. I also added some pieces of eggcrate under the bucket to raise it a bit. I then cut two holes in the lid and stuck two elbow pipes (1") in the holes. Here's the picture.

Image


Day 2
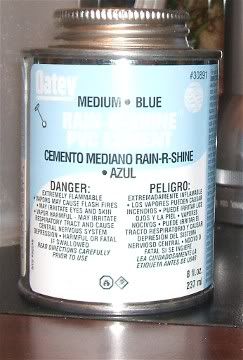
Ok made my first trip to lowe's. I got the pvc cement (rain-r-shine). It's what the chart said I needed.
Image


There were a few things I couldn't find at Lowe's or Home Depot so that will wait for another day. I looked for plastic peg board, could not find any.
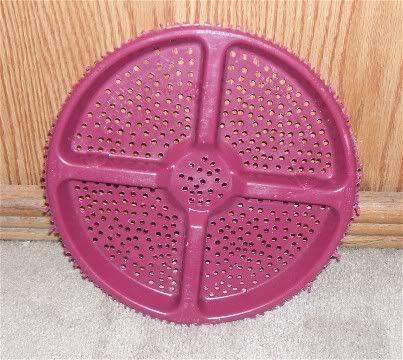
I gave up on the peg board and went to work on my own drip tray. I took another lid from a bucket and put holes in it. Here you go:
Image


My husband is now helping me with the last few pieces I need, he did some measuring and explained a few thing to me. Like how to measure pipe, hose and other things. I usually just stick it together and see if it works, if it don't I get a bigger or smaller size. I found out what ID and OD are. I can honestly say I am learing alot from this little project. I think he might be impressed.


Day 3
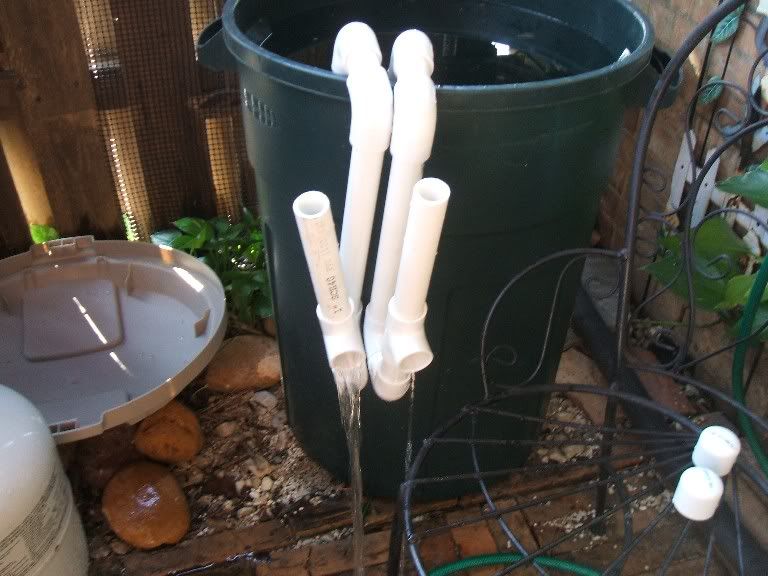
This is the second weekend working on my project. I decided to only work on it Sundays and Mondays (my days off). My husband found the last few items I need to continue with my project. I held and measured the pipe and my husband cut it for me. I then put it all together hung it on a trash can outside and started the siphon to test it. I have not glued anything in place yet. This was just my dry test run. I won't be able to totally finish until I get the tank here. Anyway here you go:
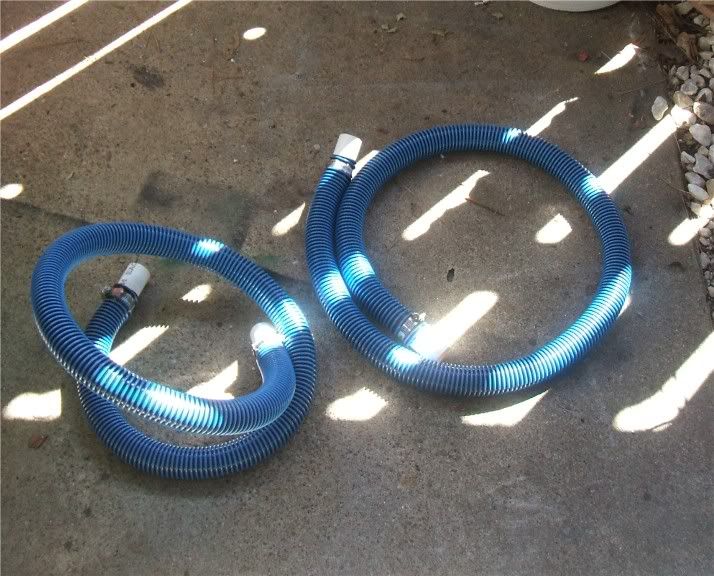
My two overflows:
Image

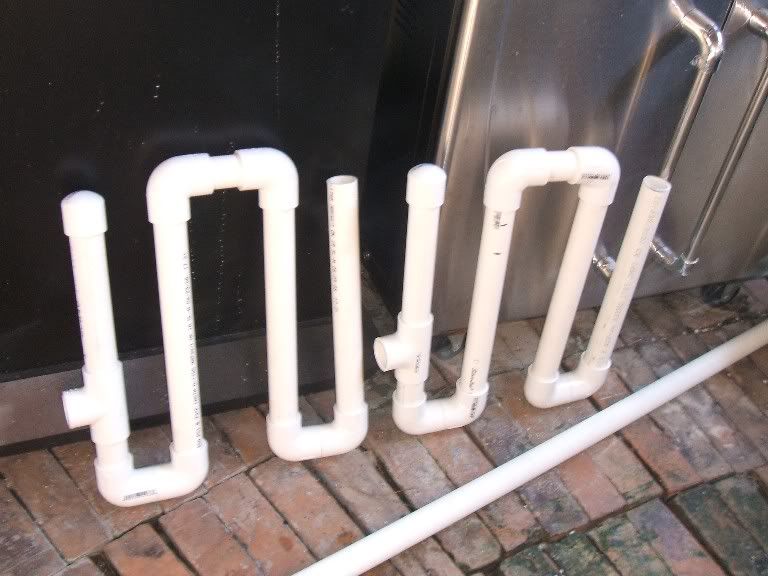
My test run on the trash can, as you can see I got one going really good and the other just a trickle. After trying again I managed to get both siphons running really well. I don't know what the exact flow rate is, I pulled the pipe up to stop the siphon and make sure it would restart . It did not loose the siphon, once I put it back down the water started to flow again.:
Image
Need to know what kind of puffer you have? Click on Puffer ID.....Puffer ID: ug.php/v/PufferPedia/
What to feed your puffer? Click on Feeding......
Feeding: library/feeding/feeding-your-puffers/
Have a GSP, need more information......Click on GSP Article.....
GSP Article: library/puffers-in-focus/an-introductio ... d-puffers/
pufferfreak
Mbu Puffer
Posts: 1012
Joined: Sun Dec 16, 2007 10:26 pm
Gender: Male
Location (country): U.S.A.
Location: San Siego, CA
Contact:

Re: My DIY Overflow and Sump Project

Post by pufferfreak »

It looks nice. I always enjoy watching these kinds of post. very informative.
User avatar
Jase
Mbu Puffer
Posts: 1579
Joined: Sat Jan 12, 2008 3:13 am
Gender: Male
My Puffers: RIP Hootey :(
Location (country): USA
Location: Montana

Re: My DIY Overflow and Sump Project

Post by Jase »

very neat. I'll keep watching :D
-Jase
edmlfc1 wrote:A house without a puffer is not a home. :D
User avatar
Dadof4
Tech Team
Posts: 2862
Joined: Sun Oct 19, 2008 5:50 am
Gender: Male
My Puffers: 1 GSP (Microfiche) RIP, 1 Monotrete Turgidus (Leon) in a 30gal. 1 Monotrete suvattii in a 40 gal FW. 120 gallon BW with 3 juvenile Dragon Gobies (so cool). 55 gal with a 2" GSP named Hank. 180 gallon being set up for a Fahaka in the next few months!
Location (country): United States
Location: North Wisconsin

Re: My DIY Overflow and Sump Project

Post by Dadof4 »

So Cool! I was looking for ideas on how to make one and this looks like it would do the trick for me! Any idea on how much water flow you'll get per hour?
"Darwin swings...annnnnnd a miss. Boy Jim, Chuck's suffered at the plate tonight. He's 0 for 3 and I'm not sure he's recovered from that shoulder pull a few weeks ago. I'll bet the front office is re-thinking that contract."
User avatar
julianchan
Fahaka Puffer
Posts: 709
Joined: Tue Jun 17, 2008 4:25 am
My Puffers: 1 GSP Elevator.....Lord Vator to everyone else...
Location: Los Angeles, CA

Re: My DIY Overflow and Sump Project

Post by julianchan »

Thumbs way up. Good luck! Thanks for posting this
User avatar
Jay.B.
Green Spotted Puffer
Posts: 437
Joined: Wed Feb 20, 2008 10:34 am
My Puffers: 1 x Tetraodon Nigroviridis
1 x Canthigaster Papua
1 x Centropyge flavipectoralis
1 x Echidna nebulosa
1 x Pair of black Amphiprion Ocellaris
1 x Fusigobius neophytus
Location: Belper, Derbyshire, UK

Re: My DIY Overflow and Sump Project

Post by Jay.B. »

cool, I kinda cheated a bit with the overflow thing, I bought a pre-built unit second hand off Ebay.
I'll be updating mine soon, as my silicone and acrylic sheets arrived the other day for making the baffles in my mini sump.
will definitely be keeping my eye on this thread... ... ...
User avatar
edmlfc1
Mbu Puffer
Posts: 2011
Joined: Sun Sep 09, 2007 5:03 pm
My Puffers: Elvis (Stars & Stripes) R.I.P. 9/11/11
125G:Fahaka (Annabelle)
Location (country): U.S.A.
Location: Texas

Re: My DIY Overflow and Sump Project

Post by edmlfc1 »

Dadof4 wrote:So Cool! I was looking for ideas on how to make one and this looks like it would do the trick for me! Any idea on how much water flow you'll get per hour?
No, sorry, I really don't know what the flow rate is.

This is what I'm waiting for now:
Get a hose hook it up to the overflow, down to the sump , wet/dry. Once I get the new tank I will do a dry test run using a mag 18. My return hose will look like this:

U=directional u tube
I=hose
T=tee connectors

U U U U
I I I I
I I I I
T T
I I
II
T
I____ball-valve
I
mag 18 pump

For test number 1, I will be using both overflows and I will be splitting my hose with 3 - T connectors , this means I will have at least 10' of head or more. Once I get it set up on the tank I will post a picture of the inside and outside. I will also be using a ball valve just in case I have to turn down the output.

For test number 2, I will be using a sump with a mag 9.5, one overflow, one directional u-tube and no splits just straight hose over the top. I may go ahead and stick a ball valve in there to adjust the flow rate.

Hopefully after I do my two test someone can tell me how much flow rate I'll be getting with both runs. :D
Need to know what kind of puffer you have? Click on Puffer ID.....Puffer ID: ug.php/v/PufferPedia/
What to feed your puffer? Click on Feeding......
Feeding: library/feeding/feeding-your-puffers/
Have a GSP, need more information......Click on GSP Article.....
GSP Article: library/puffers-in-focus/an-introductio ... d-puffers/
User avatar
edmlfc1
Mbu Puffer
Posts: 2011
Joined: Sun Sep 09, 2007 5:03 pm
My Puffers: Elvis (Stars & Stripes) R.I.P. 9/11/11
125G:Fahaka (Annabelle)
Location (country): U.S.A.
Location: Texas

Re: My DIY Overflow and Sump Project

Post by edmlfc1 »

Day 4
Went to home depot and picked up some hose and hose clamps. I cut 4 pieces at 3" each of pvc pipe for coupling. I had to figure out a way to actually put the hose over the coupling. I did this by using my T as a very large corkscrew. :D I put the coupling into the center of the T then twisted it into the hose. Once I got the hose on I was having trouble getting the T off. This is when I used the hose clamp to secure the hose and twisted the T off. When you do this on the opposite side you need to slide the hose clamp on first, then insert the coupling, install the hose clamp and remove the T. :shock: I found out a hose clamp will not fit around the top of the T. :lol:
Image
Need to know what kind of puffer you have? Click on Puffer ID.....Puffer ID: ug.php/v/PufferPedia/
What to feed your puffer? Click on Feeding......
Feeding: library/feeding/feeding-your-puffers/
Have a GSP, need more information......Click on GSP Article.....
GSP Article: library/puffers-in-focus/an-introductio ... d-puffers/
Post Reply